News

Costa Rica - One week all-inclusive at Villas Sol in Playa Hermosa

Costa Rica - One week all-inclusive at Villas Sol in Playa Hermosa

Hello fellow wanderers!

Have you been to Costa Rica? If not, are you considering going? We have been twice and will provide you with all of the tips and information necessary for a successful, safe and amazing trip to the beautiful country of CR! Pura Vida! 

Please check out our YouTube videos of our CR vacation. Our Channel is Wandered Off or click on the link via our website. 

First off, we stayed both times in our timeshare through RCI - 7 nights each stay. Our first stay was in Quepos on the South end of the Pacific Ocean side of Costa Rica back in June of 2012. Our condo was in the middle of nowhere and we tried to rent a car but ended up backing out when we got there. More to come on that later. This location was not all-inclusive but the week we spent in Quepos was amazing (white water rafting, zip lining, trip to Jaco, day in Manuel Antonio National Park) and the local food was excellent. We flew into San Jose and ended up taking a cab down to Quepos. 

Second time, we stayed at Villas Sol through RCI in November 2023. This "all-inclusive resort" is located in Playa Hermosa in the Guanacaste Region of Costa Rica. This region is on the Northern Pacific Ocean side of CR and is considered a "dry" tropical forest. 

Costa Rica seasons: Wet and Dry. Their wet season is typically June through November and the rest of the year being their dry season. CR is typically less expensive to visit during the wet season. But keep in mind, CR is mostly a rain forest, so you are probably going to get rained on no matter what time of the year it is. It is always warm rain, and you just have to embrace it with the beauty of the country. Our first stay was in the middle of June 2012, and we actually lucked out and didn't have much rain during the day, but it stormed and poured every single night we were there. This last November 2023, we stayed the first week of the month and November is a transition month from wet to dry. Our weather app literally showed rain all day every day for the week we were there. But we only got rained on a few times for a short amount of time. Besides, when you are in the pool, what is a little rain?

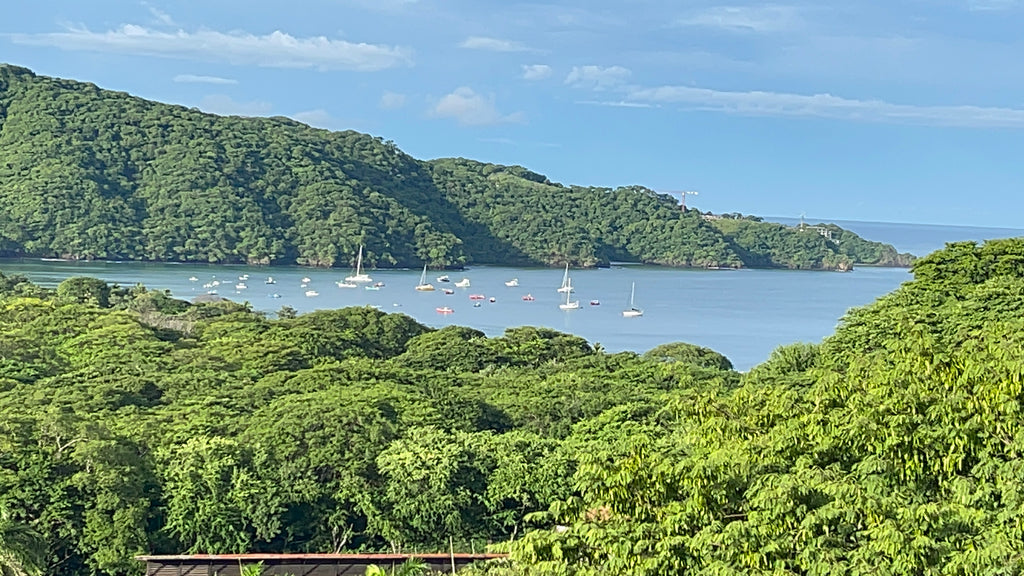
Ok, more about our recent stay. Villas Sol is a timeshare community with full time residents and a ton of vacation rentals and hotel rooms. I exchanged my points with RCI for two rooms at Villas Sol and paid $299 for each room. We were required to pay the all-inclusive fee through RCI for our stay. That fee was $525 per adult. Then each room had a $30 cleaning fee for the week. We had a standard hotel type of room that had two beds, bathroom and a small patio and then a one-bedroom condo with a full kitchen, bathroom and large patio overlooking the ocean. Below are pics of the one-bedroom condo and view from that patio. Unfortunately, we didn't take many pics of the rooms, but I do have great video of both of them on YouTube. 

More about Villas Sol: Please keep in mind that all-inclusive is used loosely when it comes to a timeshare community. This is not a Sandals or Dreams resort, so level set your expectations now. We had access to a big buffet daily for breakfast, lunch and dinner. They do close in-between to flip the food so plan according. There is also a snack shack at the main pool with a bar. The snack shack had pizza, nachos, burgers and dogs. Those are your two only options for food and the food can become monotonous even though they try to have a theme for dinner nightly. The buffet is your typical CR provisions. Fruits, rice, beans, plantains and meat. Was it worth the $525, we think so. This also includes drinks. 

Tip: Tip your bartender a couple US dollars or drop a $5 in the jar, pretty soon your drinks will be too stiff to sip. 

Tip: There is a souvenir shop at Villas Sol where you can by snacks. There is also a market down at the beach with basic groceries, a 10-minute walk or quick shuttle ride.

You cannot beat the views from the buffet. We had monkeys, several birds and baby racoons visit us while eating. It was quite an experience. 

Villas Sol has two pools and a hot tub. The main pool has the swim up bar with snack shack and hot tub is below that area accessible by a path or stairs. The other pool is located by the buffet with bar that is all included, however, there is a bar located at this pool area that is not included, you pay for those drinks. 

The main pool had all of the entertainment such as disco parties, pool volleyball, crafts for the kids and many more options with a daily list of activities. We played volleyball and did yoga while we were hanging out in the resort. The pools are heated and kept clean daily. 

The main pool with bar does not have a view of the ocean but the pool by the buffet does have a great view of the ocean! 

Tip: Bug spray. Mosquitoes can be pesky if they like you. Bring bug spray.

Tip: Bring sun lotion. There are some shaded chairs at the main pool but otherwise, there is not much shade at all. A wide brim hat would be good too. 

Tip: We never had to worry about getting a chair pool side. The shady ones tend to be claimed early in the day though.

Tip: Villas Sol will issue you a towel card which you need to return when you check out. 

Now let's talk about the accessibility of Villas Sol. While we were researching this location prior to booking, the biggest complaint I saw was that this resort sits on a steep hill and is difficult to walk. Now that we have been there, I will agree with those statements if you are not physically capable of walking up and down hills or steps. They do have a shuttle that runs constantly around the resort and to the beach and town which we did use a few times. I have a great video of the shuttle ride around the resort on YouTube that will give you an excellent view of the entire area. Now, we have goals to get steps in daily so for us, the hills did not bother us. Yes, the hills got tiring, but then we would hop onto a shuttle. Plus, we had to burn off all the food and drinks we were consuming. If you are not physically capable of walking up and down hills and steps, make sure you get a room that is close to a shuttle stop. Our room was located down a hill from the shuttle stop and a flight of stairs. 

Villas Sol is beautiful. The views are amazing from every angle. The people were fantastic and friendly. Keep in mind, they are still recovering from the pandemic which is why there are only two restaurants, and they are short staffed so be patient. We sometimes had the same server at breakfast and then again at dinner. You are a 5–10-minute walk to the beach or a short shuttle ride. The beach has restaurants all along it and we did eat at two of them. Both were excellent and the sunsets are not to be missed.

Costa Rica tips:

- Cash. We converted $500 to CR Colons for local shopping and dining. We then had US $1 and $5 for tipping servers and tour guides. At the time, $1 was equal to about 500 Colons. Download a currency conversion App. 

- WhatsApp. Download it. This is how CR communicates without using data on your phone. You will connect with tour guides and our group of 5 stayed connected via WhatsApp. 

- Rent a car. Just do it. Your vacation will be better for it if you plan to get out and explore. More to come below on car rentals in CR.

- Most everyone spoke some English, but we did run into some locals who did not. Download Google Translate App! It was very helpful. 

- Restaurants include a 13% tax and a 10% tip on your bill automatically. You are not allowed to add an additional tip onto the bill if you pay by credit card. So have some additional cash to properly tip your server above the 10% they add. We never had bad service in CR. 

- Each room comes with a safe. We kept our extra cash and passports in the safe along with jewelry if we didn't wear it. 

- If you do not like wildlife, do not go to Costa Rica. Villas Sol had baby racoons in the restaurant which we thought were super cute. Some people complained. We had monkeys in the resort. Cats lived on our patio and wanted in for food and water. We had full size raccoons trying to steel items off of our balcony. Birds would try and dive bomb our plates in the buffet. Raccoons were rummaging the trash cans. You are outside in their home, so if you do not like this type of experience, choose a different country to visit. We love animals and the CR experience being in a jungle.

Now, back to the car rental situation. Do your due diligence. We had booked a car in 2012 and when we got to the car rental company in San Jose, they all of a sudden wanted a $2500 deposit. We walked away in fear of never getting that money back. Then we spent $150 each way for a cab to our condo in Quepos and were stuck taking tours or a cab into town. So, this time around, we did a ton of research. We flew into Liberia for this stay and rented a car from a local company. Keep in mind, just because it says Avis, does not mean it is regulated by Avis. After a ton of research, we came across a local company in Liberia called Nativos Rent a Car. Their website is nativoscar.com and they did exactly as expected. You will want an all-wheel drive car if you plan to explore national parks on your own. CR does not have Jeeps for rent so the best you will get is an all-wheel Nissan XTrail which is what we rented for the week. Our rental rate for 7 nights was $375.84 plus full coverage insurance of $219.16 for a total of $595 for the week. They held a $300 deposit with the full coverage insurance. The less insurance you pay for, the higher your deposit will be and can go up to $2000. They released the deposit within a week of returning the car. They sent the car to pick us up at the Liberia airport and Nativos is located in Liberia proper, so about a 15-minute drive away from the airport. Very nice, small and family owned and we highly recommend them if you are visiting the Liberia area of CR. Their office is located within a hotel and just a small room. Don't worry, they are legit! 

Now, let's talk about excursions! Having a car rental allowed us the freedom to do what we wanted, when we wanted and way more freedom to explore. It also saved us money being able to drive to places on our own. 

The car fit all 5 of us and our luggage. It was a little tight, but doable. We saved on a shuttle to and from the hotel for each of us since we had a car. 

Villas Sol has a tour desk and they emailed us their list of tours prior to our arrival. We tried to talk to someone when we did arrive but couldn't seem to get the timing right. Villas Sol tour company is Swiss Travel Costa Rica. So, we chose to book online as our vacation progressed plus, we had our own transportation. The only tour we booked prior to arrival was a day trip to Nicaragua. 

One week CR itinerary:

Saturday: Arrive in Liberia. Picked up car. Stopped at Walmart for bottled water and basic necessities. Spent rest of day in Villas Sol, exploring and hanging by the pool. 

Sunday: We slept in and then drove ourselves to Diamante Adventure Eco Park to tackle the Superman Zipline and see the animal sanctuary. Diamante was a 30 minute from Villas Sol and was $118 per adult for all day including Superman and a buffet lunch. I believe the admission would have been closer to $200 if you didn't drive yourself and hired a tour company to take you. Superman was awesome and the food was good. The views were amazing, and the animal Sancturary was beautiful. The photo package from ziplining was $85 and well worth it in our opinion. They got some great shots of us on Superman. They have a gift shop, bar for drinks and yes, we were rained on that afternoon. Thankfully, we had finished ziplining before it started raining. On the way back we drove through Playa del Coco to check out that town and had some fantastic coffee! Check out our video of Diamante on YouTube.

Monday: We slept in a little and then did yoga and hung out by the pool all day long. We probably drank too much once we realized if you add a couple of dollars to the tip jar, they pour way more alcohol into the drinks. We played pool volleyball, made some new friends and just relaxed. 

Tuesday: We had booked an adventure hike online via leonawaterfall.com and we booked a Self-Drive Tour which just means we drove ourselves to the guide location at La Leona Waterfall Adventure Hike. We did the Private Tour for $45 each which just meant that we had a private dedicated guide just for our group of 5. This hike requires swimming to get to the La Leona Waterfall. Wear closed toes shoes as you will hike about an hour on a rugged trail with three river crossings and some bouldering and scrambling. You will then have to completely swim so you will get wet head to toe. Wear proper clothing. They provide dry bags for phones etc. and life jackets. They have lockers with a small store and small rooms for changing once you get back. We recommend this hike if you are up for it. It was fun and the falls were gorgeous! Check out our video on YouTube. Don't forget to tip your guide! They are only allowed one tour a day. 

Wednesday: Chris and I left the group and went hiking in Rincon de la Vieja National Park to the La Congreja Waterfall. We drove ourselves which took about an hour each way. You have to reserve your spot online via the CR National Park website for the date that you want for a small fee. You will receive a bar code that you will show to the visitor center which is your access to the park. Have some small cash as we also had to pay 800 Colons to drive over private property to get to the park which we did not expect. The park closed at 3:30pm in early November so start your adventures early. This park has mud pools and a large volcano which is currently closed due to activity. So, we hiked 8 miles round trip to the La Congreja Waterfall and we recommend this hike if you are physically capable. The trail was rugged and muddy making for slippery conditions. We had a hard time staying upright. Check out our video on YouTube. We had several monkey encounters and hiked through various eco systems. The falls were stunning and then we got poured on during our hike back. Was a great experience overall and we recommend this hike if you are up for it. Wear good shoes, have a dry bag in case it rains and take lots of water and some snacks. The only restrooms are at the visitor center. 

Thursday: Three of us took a day trip to Nicaragua! After tons of research, we could not find enough information for us to decide if we wanted to book a day trip to Nicaragua or not. Is it safe? Most reviews we read just complained about the long day and time spent in a van. But I am here to tell you that we did it and we highly recommend it. It was so much fun, and we saw a ton and learned a lot about Nicaragua being our first time in this country and it was actually very eye opening with how friendly everyone was and how beautiful Nicaragua really is. We booked online via nativeswaycostarica.com and we paid $255 per adult for a private tour, meaning we had the van and guides to ourselves the entire time. The tour package included all transportation, breakfast, lunch, water, entrance to Volcano National Park, a boat ride out into Lake Nicaragua to Monkey Island, and of course the border crossing. You will walk across the border both ways. You will need cash for tips, shopping at the local markets including Bate Bate Chocolate (their system was down, cash only at time) and we paid $15 each for a horse drawn carriage ride through Granada. Nicaragua takes US dollars. We left at 5:30am and returned to hotel at 7:30pm and it was well worth it. Check out our video for the full tour and border crossing experience. Just do it! Don't hesitate like we did. 

Below at the border crossing, one foot in Costa Rica, one foot in Nicaragua.

Friday: Was our last official day so we hung pool side and relaxed. Explored the beach in Playa Hermosa and had dinner down there for sunset. The local food was fantastic. The beach and sunsets did not disappoint. 

Saturday: Travel home day. We dropped someone at the airport and had a few hours to kill so Chris and I explored Liberia, found a unique and amazing coffee shop, drove around and explored an old fort and cemetery. Then we headed home back to Florida. 

Costa Rica is such a beautiful country with so much to offer. And now, we need to plan a trip to Nicaragua to fully explore that country as well. We hope this blog and our videos on YouTube help you in your future planning for some amazing adventures. Please reach out if you have any questions at all. We are happy to help. Pura Vida

Wandered Off

Chris & Brandi 

Montego Bay, Jamaica! 8 nights All-Inclusive at the Hilton Rose Hall Resort

Montego Bay, Jamaica! 8 nights All-Inclusive at the Hilton Rose Hall Resort

Hello fellow wanderers!

We were invited by some good friends of ours to join them in Jamaica this last November. Well, at the time we were not sure where we wanted to go but we knew the parameters had to include an all-inclusive package and the resort had to have a lazy river. After some research, we narrowed it down and decided we were going to the Hilton Rose Hall in Montego Bay, Jamaica. Neither of us had ever been to Jamaica before and could not wait for our next adventure into the caribbean!

Hilton Rose Hall Resort - All-Inclusive - know before you go!

OUR ROOM 

We stayed in room 439 which had a partial ocean view that also looked out over the Cinnamon Hill Golf Course. The sunsets from the balcony were stunning!

The room was clean and had plenty of space, but the beds were hard, way too hard for us and uncomfortable and the room smelled a little mildew-like when you first entered it. But these are our only complaints about the room. The balcony was great, and we use it to hang our swimsuits and towels out there to dry. 

We have a full video tour of the Hilton property and our room on YouTube. Search for Wandered Off. 

As Hilton Honors Diamond Members, we did take advantage of the discounts on the room, dinner reservations at Three Palms and renting the cabanas by the lazy river. They even had a special gathering with food and drinks one night for the Hilton Honors members. As a Diamond Member, they also delivered a complimentary gift to our room that was a bottle of rum cream. 

Because the resort is all-inclusive, you will be given a wrist band to wear at all times. Diamond Members are red in color. There are few different colors of wrist bands and I do not know what all the colors meant, but Diamond was red.

FOOD OPTIONS

The Hilton Rose Hall has 9 restaurants to choose from. Most of them do require a reservation and you should decide on where you want to eat and when and then make those reservations with the concierge when you first arrive. These places do fill up fast. 

The Buffet - No reservations required. Casual Dress. Different themes nightly with entertainment. The buffet is open for breakfast, lunch and dinner but does close in between those times to flip the food lines. The buffet was a hit or miss for us. Some meals were great, and some were just ok. We never had bad food, but this is completely biased as we all had different experiences with our different preferences of food. 

The Coffee Shop - Located in the lobby area and they serve coffee, pastries, sandwiches and ice cream. Try their pistachio ice cream... it was the best we have ever had! The coffee was really good, Blue Mountain Jamaican coffee and they even have the non-dairy alternatives, Brandi drinks hers with coconut milk. This place is also open late until about 9pm. Plus, the views from the balcony while you drink your coffee are not bad!

Annies BBQ - reservations required and a little more dress up than casual. This place was our favorite! We ended up eating here twice for dinner. The restaurant is outdoors on a patio overlooking the ocean and the beach. The BBQ, drinks and desert and the service were excellent! Highly recommend this place! Also, by day, this place is a bar that serves pizza for lunch. 

Rum Jungle - Reservations required with a dress code. This restaurant is indoor only with an Asian flare for the food. For all of us, the food was ok. Nothing to write home about. We ate here once to try it. 

Seaside Restaurant/Bar - Reservations required for dinner but not for lunch. Casual dress for lunch, a little dressier for dinner but located in the main pool area overlooking the ocean. Beautiful views. Seaside only serves seafood for dinner and since two of us in the party do not eat seafood, we opted out of eating here for dinner. But we did wander in for lunch twice and was not disappointed! The food was great, and they have the best rum cake we've ever had! Highly recommend!

Cricket Club - The Cricket Club was a late night hang out that serves drinks and burgers starting at 9:30pm. They play movies on the big screen and sports on the TVs near the bar and they even have a pool table. We never stayed late enough to try the food or drinks here. This place is indoors located next to the lobby near the gift shop and teen arcade room. 

Three Palms - Reservations required, dress code. This restaurant is located across the street at the Cinnamon Hill Golf Club and a shuttle from the Hilton is required (included). This restaurant is extra $$ per person, however, as a Diamond member, they waived those extra fees. Three Palms is Italian with steak and seafood and was excellent! Highly recommend! 

Mangoes - located adjacent to the lazy river with a swim up bar. Lunch only, no reservations required. This place serves all pool food including some good nachos and amazing drinks!

Jerk Hut - We did not stumble upon this little find until later on during our week here and wish we had found it earlier. This hut is located behind Annie's in the bushes. You have to look for it! Or smell it! They service jerk chicken and pork starting at noon until 5pm or when it is all gone. It was delish!

Private candlelit dinner for two along the beach - This is by reservation only and is $90 per person. This is not included at the resort. 

RESORT POOL & LAZY RIVER

The Main Pool - was open early to late but grab a chair early if you plan to hang to hang out all day. There are cabanas for rent, and you can either walk over Seaside to get a drink and food or wait for a server to pass by. We only swam in this pool once, at night, while listening to the entertainment on the lower deck next to the buffet. 

The Lazy River - We spent a lot of time in the lazy river! We also rented cabana 11 at the river twice. I believe cabanas were $80 for the day but Diamond members get $10 off. We had servers that brought up food and drinks. The Lazy River has entertainment of its own with drinking contests, dance contests, a swim up bar and two water slides. There is hot tub also. the only downside to the lazy river is that is closes at 4pm. That may change in the summertime when the sun is out longer.

Tip - inner tubes are first come, first serve. See an empty one, grab it. 

Tip - you can buy your own inner tube or floaty in the gift shop.

Tip - bring or purchase a covered cup for your drinks. the water features in the river will soak your drink if it is an open container. 

ENTERTAINMENT & THINGS TO DO

Nightly entertainment - is typically located at the buffet. We saw steel drummers, dancers, fire dancers, unicycle riders, Michael Jackson night, Jamaican night with Reggae, they had contests that involved the families and violinists on the upper balcony. 

Daily Entertainment - There is daily entertainment that pops up all over the resort. There is a reader board in the lobby that tells you what the adult and kid activities are daily. We did not have kids with us, but we did see the teen and kids arcade and centers, tennis courts with pro shop, lawn chess, corn hole, darts, bocce ball, soccer, beach volleyball, hammocks to lay in, ping pong and pool tables to name a few. 

Water Sports - non-motorized - the resort has kayaks, paddle boards, peddle bikes and Hobie Cats available. Everything is first come, first serve. We took a Hobie Cat out for a spin and had a great guide and had fun. 

EXCURSIONS

RastaSafari Experience - We wanted a truly authentic experience in Jamaica and after doing a ton of research, we came across this excursion that takes you out to a Rastafarian Village that has about a population of 500. We ATV'd through their village, hiked some nature trails, ate food off of the trees, visited their pot farm, learned about their culture and ate a home cooked vegetarian meal after swimming with them. This was such an awesome experience, and we would highly recommend it to anyone looking for something authentic to Jamaica! You can only book this tour through Trip Advisor. It was $160 each well worth. We have a video on our YouTube of this day at the village. Check it out. Check them out on Instagram on Facebook as well. This is an all-day excursion, not recommended for kids. 

Tip - have cash. they will sell you their "goods" as soon as you get on the shuttle, during the hike, after the hike etc.

Tip - you are with several guides throughout your time here, tips are appreciated and somewhat expected for each

Rose Hall Great House - Legend of the White Witch - we toured the Rose Hall Great House during the day and then went back at night for the interactive ghost tour. If you love plantation homes dating back to the 1700s and a good ghost story, this tour is for you! The house and gardens are stunning, and the history is crazy with the Legend of Annie Palmer, who is apparently buried on site in her tomb. You need a taxi to take you to the great house. Check out our day and night tour on YouTube, search for Wandered Off. Day tours are $25 each and night tours are $30 each. Don't forget to try the Witches Brew!

 Cinnamon Hill Great House - Home of Johnny Cash - Any Johnny Cash fans out there?? Who knew that the Carter/Cash family lived in Jamaica from the 1970s to 2012? In a1700s plantation home?? The grounds are beautiful, and the home is stunning. The best part is... the home is still full of Carter/Cash family relics and the guides stated that the family still visits and stays from time to time. How cool is that! Check out our video tour of the home on our YouTube channel. $25 admission each. 

Tip - you pay and start tour at the Rose Hall Great House

Tip - you need a taxi

Chukka Eco Tours - Zip Lines & River Tubes - We booked a half day tour with Chukka that included four zip lines (website says 6), we river tubed which was also fun and then we climbed up the pool waterfall to the top and jumped off the 45' tall waterfall. There is a long water slide, restaurant serving jerk chicken and a bar with drinks. There is a decent sized gift shop and nature trails walking through the historic plantation property dating back to the 1700s. I think we paid roughly $130 each for the half day. This place is still recovering from the pandemic, so it was not very busy. Check out our full video of our Chukka experience on YouTube. Search for Wandered Off. 

Tip - Lockers cost $10 to rent

Tip - wear water shoes

Tip - have a waterproof case for your phone

The Aqueduct - there is a historic aqueduct on the golf course adjacent to the Hilton that is a few minutes to walk to go explore. This aqueduct was built in 1837 and if you love historical structures, it is definitely worth the walk over to see it. Not to mention, the golf course is beautiful too! And it is free to see!

The Shops at Main Street - we walked across the golf course to the Shops at Main Street to do a little souvenir shopping and exploring. The shopping center was vibrant and had a jerk chicken hut, street vendors and shops with restrooms. If you do not want to venture into Montego Bay for shopping, we highly recommend this little place and the best part is, you can walk over there for free, you just have to cross the golf course. 

OVERALL EXPERIENCE

Tip - Hilton is all-inclusive, however, if you receive exceptional service, they would like you to tip, but not required

Tip - Taxi drivers are licensed and only drive vehicles with red license plates. Tourists should only get in vehicles with red plates for their safety. Taxi drivers are always upselling and will randomly take you to a shopping center trying to get you to shop

Tip- Tips in general, carry cash. The Hilton has an ATM and will provide change for smaller bills. We were tipping in $5 but quickly realized that $1 tips were sufficient

Tip - Once you leave the resort, they all expect a tip, but never forced. Everyone we encountered was very nice and respectful

Tip - Do not eat at Scotchies in Montego Bay. This was the only place we encountered rude people during our entire trip. After leaving a tip at the front counter when we paid, the cook actually demanded a tip from us before he would let the lady give us our food. And the jerk chicken was not that great. We had way better jerk at other places. Save your taxi fare and time and do not go here!

Tip - We never felt unsafe anywhere we went. As a tourist in a foreign country, you have to always be aware of your surroundings and do not make dumb decisions. We felt more unsafe in Mexico than we did in Jamaica

Tip - Ask the Hilton Concierge for their list of excursions prior to booking. We booked all of ours through other agencies prior to arriving

Tip - Airport Shuttle - Hilton provides a shuttle service for a fee. $50 each way for a private shuttle or less expensive if you share a shuttle and don't mind stopping at other resorts along the way. We opted for the private shuttle. Well worth it. You can also book a shuttle through Expedia or other booking sites.

Tip - We had booked a Catamaran Cruise that was taking us to Margaritaville in Montego Bay, but it stormed that night and the tour cancelled on us as we were driving there in the shuttle. We knew it was going to be cancelled because it had stormed and poured all day, but if we cancelled, we didn't get a refund. So we went along with it. While we were driving to Montego Bay, the shuttle driver pulled over into a shopping center and announced that the cruise was cancelled, and we now had time to shop. Everyone got off of the shuttle except us. We had done our shopping and didn't want to shop anymore. So we were forced to sit on the shuttle and wait for almost an hour. We feel that the cruise was cancelled earlier in the day, and we should have called to check, versus be forced to shop or sit in the shuttle and wait. It was very frustrating.

Tip - There is a fitness center to use if you want to burn off the calories that you eat.

Overall, we had a fantastic experience in Jamaica and would go back. The only downside to the Hilton was the super hard beds, but some people like that, we do not. 

Check out our series of videos from our Jamaica adventure on our YouTube channel, search for Wandered Off. 

We really hope that you enjoy our vidoes and that they help you during your planning phase of your future Jamaican vacation!

Thanks so much for wandering off to Jamaica with us!

Wandered Off

Chris & Brandi - Guest Starring Rick & Ginger

Moab, Utah - Make the most of your time!

Moab, Utah - Make the most of your time!

Hello fellow wanderers!!

If you haven't been to Moab, Utah, you should really add it to your list! Moab has two of the "Mighty 5" National Parks and a State Park, not to mention, everything else around this area. 

We stayed for two weeks in our RV at the KOA Moab and absolutely loved our stay and two weeks was just not enough time to do everything on our list. So, we had to prioritize our bucket list of items for our time in Moab, knowing... we would be back soon!

Placed in and around Moab that are a must to add to your list:

- Arches National Park

- Canyonlands National Park

- Dead Horse Point State Park

- La Sal Mountains

- Castle City

- The Colorado River & Green River

Things that we did:

- Hiked

- Rappelled

- Rafted

- Shopped & Ate 

- Explored Downtown Moab

Arches National Park: 

We spent two days in the park. The first day we spent checking out the visitor center and driving the entire park, we hiked to the Delicate Arch Viewpoint and several other arches and ended our day hiking in Devil's Garden. The Second day we hiked Fiery Furnace. This hike requires a permit via Recreation.gov and we somehow lucked out and got a permit during our stay. This hike was amazing. Check out our video of the full hike and of our other day in Arches. 

We tried twice to get into Arches, but the park was at capacity, so we had to wait. This was September 2021, and they implemented a new timed entry system for the park in 2022 and moving forward. 

We will be back to Arches! Two days was not enough! AND... September was still in the 90s! It was HOT. 

TIP for ARCHES: Plan ahead! Make necessary reservations and get necessary permits for hiking.

Canyonlands National Park:

We LOVE Canyonlands! Easily one of our top five favorite National Parks! Canyonlands is broken up into three districts. Island in the Sky, Needles and The Maze.

We spent one day exploring the Island in the Sky District. Hiked to Mesa Arch and checked out Shafer Trail. We attempted Shafer Trail with our F350 but decided to turn around as the weight of our truck on the edge of the road was a little nerve racking. We will be back in our Jeep to tackle this trail! 

Island in the Sky is a close drive just outside of Moab and adjacent to Dead Horse Point State Park. Island in the Sky you are standing on the rim of the canyon looking down.

We spent our second day in Canyonlands Needle District. The Needles Dist. is a two-hour drive from Moab but absolutely worth it! We explored the visitor center and then took off out to our hike for the day. We spent all day hiking the Chesler Park Look and the Joint Trails. Not an easy hike and it was easily in the 90s and hot but the views are epic. The Joint was awesome! This is one our top hikes ever and we highly recommend. Check out our full video of the hike. Video includes directions, all the info needed for a successful hike with tips. 

The Needles Dist. puts you down in the canyon looking up at the needles, hiking through them and through slot canyons. This area of Canyonlands is very remote and easy to get lost in. Be prepared. But it is absolutely worth it!


Dead Horse Point State Park:

Dead Horse Point State Park entry is on the way to Canyonlands Island in the Sky Dist. and also looks down on the canyons. The park gets its name from an old story about horses being left out at the point to die. We hiked the rim and drove around and explored the park. The views of the river are amazing. Thelma and Louise also drove off the cliff just below this park, if you have a 4WD, you could make it out there to see the area. This park was about a half day adventure for us. Not much to do here in the way of hiking for us. 

If you have time, take a day and drive up the La Sal Loop Road. The La Sal Mountains are beautiful and a nice break from the heat down in Moab. We drove up and explored Oowah Lake and ended up at Castle City. The drive is scenic and peaceful. 

Oowah Lake above

Castle City Monument above

Are you up for adventure? We booked two guided tours through Moab Adventure Center. Highly recommend them! The guides were awesome, and the tours were amazing!

First tour was a guided hike and rappel at Grandstaff Canyon and Arch. We were on this tour with a group of gals from SLC. They were a fun group and made the hike and rappelling super fun! Our guides were fun as well and did a great job keeping us safe during both rappels. Grandstaff Canyon and Arch are beautiful.

Second tour with MAC we rafted the Colorado River just below Arches National Park. This rafting tour stopped at Red Cliffs for lunch and lasted about 3 hours total. The scenery cannot be beat and the fun we had through the rapids was an adventure! We even stopped to jump in and cool off. Our guide was great, and we had a very fun group of content creators on the raft with us. 

Moab also has inner city trails and walking/bike paths that meander from the park on the Colorado River near Arches all the way to the South side of town. Moab is beautiful and charming with Art in Public Places throughout the town including tons of murals on buildings. Be sure to walk around and explore, shop and dine! You will not be disappointed. 

Our favorite spots to eat:

Sunset Grill hands down for dinner! Eat out on the patio overlooking Moab and the Colorado River and experience one the best sunsets you will ever see. Did you know that this desert oasis is colored in green? Moab is lush with green and that red rock backdrop just makes this desert town absolutely stunning to visit!

Love acai bowls as much as we do? Glorias Cafe is the best acai bowl we have come across nationwide... yes... we said nationwide! Look at this thing!!! $15 and could easily feed two people! Pretty sure there is an entire jar of peanut butter on this bowl, and it was amazing!

Like BBQ? Blu Pig not only had great food, but service was also great, and the live music was fantastic! Make sure you stop by here when you hungry!

We definitely plan to visit Moab again in the near future. Only this time, we want to stay for a month. There is so much to do and see in this area and here is something for everyone. The KOA was about 10 minutes from town and we thoroughly enjoyed our stay there. You can see our RV Park tour on video, visit our channel on YouTube: Wandered Off

For additional information, please check out our videos of Moab and the surrounding areas on our YouTube Channel: Wandered Off. If you have any questions, shoot us an email and we would be happy to help. 

The number one tip I could give to anyone visiting this area is to plan accordingly. Determine the amount of time that you have and what your priorities are (must see and do) so that you can maximize your time. Check with the parks to see if reservations or permits are needed. Understand that most places are within a 30-minute drive from Moab. 

Thanks so much for wandering around Moab with us! We hope you enjoy this area as much as we did.

The Adventure Begins!!

Wandered Off

Chris & Brandi


R2R Hike - North Kaibab to Bright Angel - 5 nights backpacking in the Grand Canyon

R2R Hike - North Kaibab to Bright Angel - 5 nights backpacking in the Grand Canyon

Hello fellow wanderers!

How many of you have visited the Grand Canyon? Did you know that nearly 6 million people visit the Grand Canyon annually, making it the second most popular National Park to explore? 

Did you also know that out of those 6 million visitors, only less than 1% of them make their way down into the canyon? That is less than 60,000 people annually that venture down into the canyon's immense beauty and possibly hike rim to rim over the Colorado River. 

After Chris suffered his brain hemorrhage in 2019, he started preparing his bucket list with immediate execution of the list and the number one bucket list item was hiking the Grand Canyon. He started preparing for it in 2020. It took months of preparation and filing for permits (tips below on how to land a spot in their permit system). 

The above photo is our itinerary of 5 nights and 6 days. We watched a ton of videos in research of the epic hike but found that most people hike R2R in one day or R2R2R also in a day or two. We found very little research in the way of people taking their time and backpacking their way through the canyon. We did not want to rush this hike and Chris couldn't physically rush it regardless with his brain injury. We wanted to take more than enough time to enjoy it, soak it all in and have that ever-lasting memory forever engrained in our minds. 

We do have videos of this epic adventure on YouTube. Check us out at Wandered Off. These videos show the campgrounds, resthouses, shuttle and everything you need to know prior to your hike. 

Chris applied for the permit for several months with no luck. After talking to the rangers asking for tips, we finally figured out that if we put "any" for our dates we might luck out sooner or later. And we did. We put our itinerary (which was not going to change because we wanted to camp a certain number of nights) but we put "any" for dates and allowed them to reverse it if needed (SR to NR vs NR to SR). 

AND... we finally lucked out and got a permit with our exact itinerary but the dates they gave us were the last week of June 2021. We knew we had to be flexible with dates if we wanted a permit to camp so we worked with what they gave us! But it will be hot as heck that week. So, we started preparing for that week of backpacking.

TIP: You have to be flexible and take what they give you if you want to camp!

Our itinerary:

June 25th - We shuttled to North Rim from South Rim and stayed at the hiker/biker camp area for the night. Walk up permits, no reservations. $6 per tent. North Rim is cold, freezing cold (45 degrees at night). So be prepared for that. There is a store at the North Rim Campground and food at the Grand Lodge. Pic below are the tent sites at the North Rim hiker camp area. Site pads are loose and did not hold the tent stakes, so we tied off to rocks to hold the tents down.

June 26th - We started our hike down the North Kaibab Trail to Cottonwood Campground. This leg of the hike is 6.8 miles down 4,170' in elevation.

- North Kaibab Trailhead has restrooms and water (is 0.6 miles from hiker camp area)

- 1.7 miles down is Supai Tunnel with restrooms and water

- 4.7 miles down is Roaring Springs with restrooms and water

- 5.4 miles down is the Ranger Station with restrooms and water

- 6.8 miles down is the Cottonwood Campground with restrooms and water

Pic below is our site at Cottonwood Campground. Ground was hard and bent or broke our stakes, so again we tied off the tents to big rocks.

June 27th - We hiked from Cottonwood Campground to Bright Angel Campground which is about a 1/4-mile past Phantom Ranch. This leg of the hike is 7.2 miles dropping 1,900' in elevation. This portion of the trail does not have restrooms or water stations. None! We each carried three liters in our packs with a collapsible bottle full of water and Chris carried an extra bladder with 2L of water in it just in case. This portion of the hike is through "the box" which is a narrow canyon that gets very hot, extremely hot with no wind. There is a creek along this trail that you can filter water from so have a water filtration system with you, whether you think you need it or not. We were fortunate enough to not have to use our filtration straws, but we had them just in case! The pic below is our campsite #5 at Bright Angel on the creek. Again, we tied off to rocks to hold our tents down.

June 28th - We stayed two nights at Bright Angel Campground in site 5. We took this day off from major hiking. We did hike to out the Colorado River and explored that area and the Black Bridge connecting North Kaibab to South Kaibab Trail and hung out on Boaters Beach. We also spent the rest of our day sitting in Bright Angel Creek at our camp site. One of the Rangers told us "The people who die down here are the ones that refuse to get in the water". So that is what we did. All day long. It was 138 degrees at Bright Angel Camp. Bright Angel Camp has restrooms and water. We preordered dinners and breakfast from Phantom Ranch (more to come on that). 

June 29th - We hiked from Bright Angel Camp to Indian Garden. This portion of the hike is 4.7 miles with an elevation gain of 1,620'. Yes, you read that right, we are now headed up and out of the canyon. There are some small creeks along this path for water filtration if needed. This is where we had a pink rattlesnake literally feet from our tents. Indian Garden camp sites have picnic shelters which was a very welcomed surprise!

- 1.5 miles to the River Resthouse with restrooms but NO water

- 4.7 miles to Indian Garden Campground with restrooms and water

Pic below is our campsite at Indian Garden. Again, we tied off our tents to rocks here too. 

June 30th - We hiked from Indian Garden up and out of the South Rim completing our Rim-to-Rim hike. This portion of the hike is 4.8 miles and is probably the most challenging portion due to the 3,060' in elevation gain on the last day. This portion of the hike has zero shade. None. Direct sun the entire way. 

- 1.7 miles is the 3-mile Resthouse with restrooms and water

- 3.2 miles is the 1.5-mile Resthouse with restrooms and water

- 4.8 miles is the Bright Angel Trailhead at the South Rim with restrooms and water (this is the end of the trail on the top of the South Rim)

Pic below at the 1.5 mile resthouse... just give you some perspective while you are exhausted and barely making it on this last day LOL!

Weather:

North Rim - was freezing (45 degrees at night) and we packed warm clothes just for that night that we carried the rest of the way and did not use again. Brandi did use her sweatshirt as a pillow the remaining nights.

Cottonwood Campground - was 100 degrees and we shed layers on the way down from the North Rim. It quickly got very warm. It is monsoon season mid-June through mid-September so keep that in mind. It ended up pouring on us as we were sitting in the creek cooling off and soaking our feet. 

Bright Angel Campground - there is a thermometer at this campground and at Phantom Ranch. At 2pm it was 138 degrees in the direct sun and 104 in the shade. It did not drop lower than 90 at night making for a very hot and uncomfortable time to sleep. We lucked out and received no rain at Bright Angel, although, we probably would have welcomed it. 

Indian Garden - it was hot and windy. Tents that were not secured enough to the ground blew around in the gusty wind. We did get rained on briefly, but the wind gusts are what kept us up this night. We were thankful for the picnic shelters at this campground.

Our last day hiking up the South Rim - there is zero shade on this trail, so we started in the dark. We got some reprieve of the intense heat as we hiked up the trail. It did torrential rain at the South Rim about an hour after we made it to the top. 

TIP: Take a reflective umbrella. This umbrella will keep your head about 15 degrees cooler in the direct sun but will also keep you dry if it rains! We purchased ours on Amazon after doing some research. They were $60 each but well worth the money!

TIP: Be prepared for any AND all-weather conditions! Preparation can make or break your hike!

Pics below are us "enjoying" the down pour at Cottonwood and the thermometer at Bright Angel Camp.

Food:

We highly recommend going online and reserving dinner and breakfast at Phantom Ranch. We stayed two nights at Bright Angel, so we reserved dinner and breakfast (2 dinners & 2 breakfasts). The food was good (not great, but we were at the bottom of the Grand Canyon so...) but so worth not having to carry extra food in our packs. It is pricey. $60 for dinner (steak, potato, salad and brownie) and breakfast was $30 (pancakes, sausage, eggs and orange juice). Phantom Ranch has a store which offers iced tea and lemonade for $5 (keep your cups for $1 refills). They have a variety of candy and small items that you might need during a hike (first aid etc.). 

Pics below are of our prepaid breakfast and dinner meals from Phantom Ranch. Again, totally worth it to avoid having to carry extra weight of food in your pack and it was a nice change from our backpack meals. 

We also packed our own food and boy did we over pack and not pack the right things. Well, I take that back. The issue was, it was just too dang hot to eat, especially hot food over a jet boil. We had each packed hot meals to prepare which none of us wanted to eat. 

TIP: Keep your food in your food boxes (bear boxes). All of the animals will try to get your food if it is in your tent, backpack or on the table. This includes squirrels, deer, rats and ravens. 

FUN TIP: Bear boxes are NOT ant-proof. We put our baggie of dried mango in the box and the baggie was not quite sealed all the way and the entire box became an ant hill. The mangos were trash after that. 

TIP: We packed peanut butter packets for protein. It melted and liquified in the heat and was gross. Do not do that. It was a waste. 

We ended up giving our hot meals away to fellow campers because we did not want to eat them or carry them at that point. We survived off of oatmeal (purchase the regular store bought quaker, not the expensive kind like below in the picture), protein bars, nuts, dried fruit, veggie chips and what we purchased at Phantom Ranch (again we highly recommend doing this). 

TIP: We shared one jet boil that Chris carried and then we each carried a fuel container. We did not even use one entire fuel container between the three of us, so we carried two extras for nothing. Might be a different scenario if we actually cooked and ate our hot meals though. 

TIP: There are no trash cans in the Grand Canyon. You pack out what you pack in. All of these food wrappers had to be cleaned and wrapped up into gallon baggies that we brought for trash. It becomes a lot when you realize these empty packages have to be cleaned, squished and stored in your pack, also keeping animals out of your food trash!

Hydration:

NUUN all the way! We met a fellow Instagrammer at Death Valley early in 2021 who is a NUUN ambassador and avid runner. After some conversation with him and further research, we decided NUUN was the way to go for our hike. We purchased NUUN sport with caffeine to consume a few times a day during the hike and the NUUN recovery for the night. We can swear by this product and highly recommend it. We kept a collapsible bottle to put our hydration tabs in. We also carried Gatorade hydration chews (which tasted like candy, very good).

TIP: Carry a collapsible water bottle for your hydration tabs. You do not want to put your hydration tabs in your camelback. 

TIP: Check with the Rangers before your hike and during your hike. They will know which water stations are out of service and post the most recent water advisories. 

TIP: The Rangers truly are your friends! Utilize their knowledge and listen to them! Heed their warnings! The Grand Canyon is fierce and no joke!

TIP: Carry a water filtration system even if you think you will not need it. Anything can happen out there! We carried two straws just in case, but thankfully did not need to use them as all of the water stations were working during our hike.

TIP: Having enough water is a LIFE or DEATH situation in the Grand Canyon!

Clothes:

We each had a set of warm clothes for the North Rim which we carried the entire way and did not use after the North Rim. It did drop to 45 degrees that first night. 

We each packed two pairs of light weight hiking pants and two light weight SPF long sleeve shirts. Alisha and Brandi each had two sports bras and we all had two pair of underwear. We had a pair of hiking socks for each day. Brandi wore and recommended the Injinji toe socks. Having clean socks was a must daily. The underwear and bras we could wash out in the creeks and sinks (you are not supposed to do laundry in the sinks BTW). 

The sinks we came across were at Bright Angel Camp and Phantom Ranch. Every other restroom was a vault toilet with no running water to wash in.

We each had a wide brim hat and a R2R buff which we kept wet as much as we could by dunking them in the creeks and soaking them at the water stations. 

We each had an outfit to wear while we were not hiking, and we slept in that outfit as well. 

We believe we had the right amount of clothing except the excessive warm clothes for the first night. 

Ok so let's talk about shoes shall we. Brandi wore her North Face hiking shoes for over a year prior to this hike with no issues. Same with Alisha. But hiking down 5,000' over very few miles in the beginning was torture on the feet, especially the toes. Alisha lost both of her big toenails and Brandi has lost both of her little toenails (one of them she has lost twice now). Somehow, Chris was fine with no feet issues. By the time we got to Cottonwood Campground, our feet were done. But we put our shoes back on the next day to Bright Angel Campground, which was a mistake. Alisha and Brandi never put their hiking shoes back on after that. Brandi wore her Tevas the rest of the time, including the hike out of the canyon with toe socks on. Alisha wore her Chaco Sandals out of the canyon from Bright Angel as well. 

Sandals are a must since you are spending so much time in the water, and they are nice to have to wear around camp anyways. 

The Rangers told us they all wear trail runners in and out of the canyon. It is too hot to wear hiking shoes or boots on that trail. 

TIP: If Brandi did this hike again, she would wear her Tevas (keep her toes free) down the canyon and her new trail runners up the canyon. 

TIP: Do not over pack clothes. They take up a lot of room and add a lot of weight to your pack. 

Pic below is Brandi's pack and contents. 

Gear:

Now, let's talk gear. We each had a lightweight tent, sleeping bag and sleeping pad. Alisha had a sheet instead of a bag. We each had a lightweight backpack. Osprey is the brand Alisha and Brandi had. Chris had an REI backpack. The sleeping pads were annoying as they squeaked every time you moved. Brandi also had a yoga mat that she placed under her sleeping pad which she is not sure she would carry again. 

TIP: Tent stakes were not used. The ground the was either too soft to hold them or too hard and the stakes broke pounding them into the hard ground. We tied off our tents the entire time to big rocks found at the campsites. Do not carry tent stakes, it is added weight that you do not need, and they take up room! Just make sure you have enough rope to tie off to rocks with.

Waterproof bags for toiletries. Q-tips, Band-Aids, first aid, small bottle of sun lotion, tissue, face wash, deodorant and whatever else you need.

We each had our phones and Chris had the GoPro. So of course, how did we keep our batteries charged? We each had a portable charger that was solar operated. We kept those on the outside of the backpacks as we hiked so they charged while we hiked and then left them on the tables in the sun. They worked, but they were pretty slow. Chris also had one solid portable charger that he used for the GoPro batteries that we bought off of Amazon.

We only used our phones (no service at all) to track our mileage and time and of course to take photos and videos. Alisha also downloaded some audible books to listen to or read at night. 

We hiked every day between 5am and 11am at the recommendation of the Rangers. That meant that we were up at 4am and 3am on our last morning. We had headlamps and flashlights with extra batteries. We ended up carrying more batteries than we needed, and they can be heavy to carry.

TIP: If you wear long pants and long sleeve shirts with SPF clothing and a hat or use an umbrella, you do not need sun lotion. We never used it and carried it for no reason.

TIP: Deodorant melts in the heat. It will be unusable anyways and it made a mess when you opened it. Do not carry any with you. Besides, we would have smelled regardless after 6 days of no showers and sitting in the creeks. Leave your deodorant at home! Not worth the mess and you cannot throw it away after it melts. 

TIP: We carried baby wipes to clean ourselves with. 

TIP: Gallon baggies, empty. You have to pack out what you pack in. Have bags to seal up the trash that you create (food wrappers, wipes, etc.). There are no trash cans in the canyon and the Rangers do not want you throwing anything away down there because they have no way to carry it out of the canyon. 

TIP: Women who are menstruating (Brandi started the day we shuttled over), have tampons or whatever you use because you will not find any to purchase anywhere once you leave the North Rim store. Have a way to dispose of them in your backpack. Pack out your waste. 

TIP: We each carried a wag bag. Thankfully, we did not need to use them but just in case you cannot get to a toilet fast enough, carry a wag bag for emergencies, pack out your waste. 

TIP: We cannot say this enough! Talk to the Rangers. Chris called the back country permit office quite often prior to our hike to pick their brains. One Ranger recommended we bring reflective umbrellas. We quickly got on Amazon and purchased three for our hike. $60 each. But so worth it. When you are in direct sun, the umbrellas keep your head about 15 degrees cooler. AND we used them when it rained too. You can see the umbrellas in the photo above. Seriously though... the Rangers will help you and guide you. They told us we were crazy to hike that week, but they did give us a permit to hike that week, so we prepared for the heat and the Rangers helped us! TALK TO THE RANGERS!

Preparation:

We hiked a lot. We hiked in the heat of the desert and in the elevations of the Sierra Nevada. Squats, lunges and leg exercises, stair climbing. Highly recommend that. 

Talking to the Rangers for months prior. They can tell you everything that you need to know and are happy to help. 

Blogs and YouTube. Tons of information is literally at your fingertips. Again, we did not find a lot in the way of people backpacking for several nights so we hope this blog and our videos help you in your planning process!

Grand Canyon National Park website! Phantom Ranch website. It is all there! Reserving the shuttle, meals etc. Check the park websites!

TIP: Trans Canyon Shuttle does fill up quickly. As soon as you have a set itinerary, go online and reserve your shuttle. $90 per person one way from one Rim to the other Rim. We called and talked to them as well. Very friendly and helpful. The drive from South Rim to North Rim was about 4.5 hours and we made three stops. Two stops at small stores with restrooms on the Navajo Nation Reservation and one stop at Marble Canyon as shown below in the pic. Marble Canyon also had restrooms and a small native souvenir shop. 

We parked our fifth wheel at the KOA Circle Pines in Williams, AZ for two weeks. You can see a tour of this RV Park on our channel at Wandered Off. We drove down a week prior to our hike and picked up Alisha in Phoenix a couple days prior. We had gone to the South Rim and explored the route; shuttle pick up area and talked with the back country Ranger's station, again, talk to the Rangers!! Checked the weather and water advisories and bought our "we hiked R2R" gear. 

TIP: Although we lucked out and had working water stations throughout the entire hike, the week after our hike, the water stations on the North Rim side were out of service. You need to check the day before your hike and be prepared for anything!

There was a wildfire in Williams at the time and the KOA was up for evacuation, but we were not giving up our permits to hike so we told the KOA if evacuation becomes mandatory, the RV will burn, and we will be ok. We were not giving up our adventure and we can always buy a new RV. Thankfully, it was still there when we got back. 

Back country campers like us are supposed to park in Lot D at the South Rim next to the back country permit office. Then you walk over to the Bright Angel Lodge where the Trans Canyon Shuttle will pick you up. You need to reserve the shuttle in advance. It was $90 per person one way. They dropped us off at the North Rim Campground. 

We did not venture off the beaten path during our R2R hike due to the weather and our blisters. We did end up hiking 42 miles overall when you include the hiking, we did at the North Rim prior to starting the R2R and hiking around Bright Angel Camp and the Colorado River. 

TIP: The Rangers told us to not hike during the hours of 10am and 4pm. Those are the hottest times of day. We were up at 4am every morning to be on the trail by 5am and we did our best to be at the next camp by 11am at the latest, which we accomplished. Our last day we were up at Indian Garden at 3am and we hit the top at the South Rim by 7:30am, just as the sun was getting direct and hot. 

TIP: Sit in the water. Dunk your hats and shirts. Get wet! Stay cool!

Please check out our video on YouTube. We show each campground and a provide a ton of info to help you plan a successful Rim to Rim backpacking hike in the Grand Canyon. Please let us know if you have any questions that we have not answered here or in our videos.

TIP: The Grand Canyon National Park Website has all of the information that is needed and what you do not find there, the Rangers can help you with as well if you call the back country permit office. 

We wish you the best on your Grand Canyon adventures and we hope that the info that we provide will help you along the way!

Thanks so much for wandering through the Grand Canyon with us!

Wandered Off

Chris and Brandi and Alisha


We sold the house & became full time RVers!! Reviews of 5 KOA RV Parks from Nevada to Florida

We sold the house & became full time RVers!! Reviews of 5 KOA RV Parks from Nevada to Florida

Hello fellow wanderers!

We did it! We became full time RVers!

This was an unintentional decision. The house we purchased in Northern Nevada (Lake Tahoe area) was an investment property that we purchased to flip, and that time had come. During this time, we found that our kids were moving back to the Florida Keys with military orders. 

Our plans were to sell the house and purchase property in the Florida Panhandle and an investment property somewhere in Southern Utah (two of our favorite places). But then life happened, and we decided to follow the kids back to the Keys so we could spend more time with our granddaughter. 

We had intentions on purchasing another house and renovating while we were in the Keys near the kids. However, interest rates rose at an insane rate and there is nothing on the market in the Lower Keys within our price range that we were/are interested in buying. 

Lucky for us, the kids bought a house on Big Pine Key and our fifth wheel fits in their front yard! We quickly installed 50-amp power and connected to their water and sewer and here we are living full time in our fifth wheel in their front yard with full hook ups... AND... we get to see our granddaughter on a daily basis!

Now... let's get down to the nitty gritty of our move from Nevada to Florida. We had consolidated our belongings to our fifth wheel and an 8x16 box trailer. We made two trips back and forth between Nevada and Florida. 

First trip was early March 2022 as we put our house on the market. We decided to drive the fifth wheel down and the Jeep on our first trip. Chris pulled the fifth wheel with our F350, and Brandi drove the Jeep with our youngest daughter and two cats. We stayed in KOA's the entire time (we are KOA VIP members). 

From Nevada to Florida, we spent way too much on fuel with the gas and diesel prices at an all-time high (so we thought). 

3,100 miles from Gardnerville, NV to Big Pine Key, FL

F350 diesel cost us $1,350 (we averaged $4.25 a gallon - today diesel is almost $6 a gallon)

Jeep Wrangler gas cost us $615 (we averaged $4.11 a gallon - today gas is almost $5 a gallon)

6 nights at KOA's cost us $465.28 (an average of $77.55 night)

Our total cost to drive from Nevada to Florida in early March is $2,430.28 not including food or random expenses. 

We stayed at 5 different KOAs along the way and had a great in and out experience at all of them except one. This one bad experience has us crossing that KOA off of our list, we will never stay there again. But more to come on that below. 

Day 1:

We drove from Gardnerville, NV to Kingman, AZ. We hit rush hour traffic in Las Vegas and Northern Las Vegas has a lot of highway construction going on. This caused a slight delay in our day. 

We stayed at the Kingman KOA Journey for the one night. We had a pull through spot (spot 112) with full hookups for $54.44. We arrived after hours as it was almost dark out. We had a KOA escort to the spot as one of the work campers were still around the office when we arrived. We got hooked up and settled in for the night. The next morning, we quickly toured the park and started day 2 of our trip. 

This KOA was set back off of the highway which is unusual for a KOA Journey. So, you did not hear any road noise at all, but they are tucked back in a residential area. We hooked up Wi-Fi for the fire stick and had no problems with that. Good cell service. We did run to Denny's for food, but it was packed so we hit the Sonic drive-thru instead which both were located close by within a few minutes of the park. It was a great spot for a quick one-night stay.

Day 2: 

We drove from Kingman, AZ to Tucumcari, NM and stayed one night at the Tucumcari / Route 66 KOA Journey. This KOA is located right off of Highway 40, but we did not hear any road noise. We arrived again after hours but had a work camper follow us to our spot (spot 37) to tell us that it was going to freeze that night, so we had until 11pm to fill tanks and shower because he was shutting the water off. Again, we had a pull through site with full hook ups for $54.43, but we ended up hooking up to clean up and shower and then we unhooked the water and sewer before going to bed, leaving only the electrical hooked up. We hooked up the Wi-Fi for our fire stick and had no issues. Good cell service. We have T-Mobile. The sunset was beautiful. We quickly toured the park the next morning and then started day 3 of the trip.

On our drive from Kingman, we were delayed due to crazy weather the entire way to Tucumcari. We drove through high winds into Flagstaff, on top of snow. We then hit high winds again entering New Mexico and smoke from the Las Vegas, NM wildfire and we drove by a brush fire literally on the side of the highway within feet of traffic. 

Day 3: 

We drove from Tucumcari, NM to Lake Conroe, TX which is about an hour north of Houston. This was a long push for us but everything between Amarillo and Houston was fully booked when we reserved at the last minute. We pulled into the Lake Conroe KOA Holiday completely in the dark and left the next morning in the dark. We had a pull through spot with full hook ups for $65.80. No Wi-Fi or cell service issues. The park looks pretty nice, and we wish we could have stayed a little longer. 

Our drive from Tucumcari to Amarillo was an interesting one. Again, we had wildfire smoke and high winds in New Mexico and then in Texas we had snow, sleet and freezing rain. Brandi even lost control of the Jeep doing about 35 mph. These weather conditions slowed us way down on this day making our already long haul even longer. 

Days 4 & 5:

We left Lake Conroe, TX and headed for Pensacola, FL for two nights. We had to stay an extra day here to spend some time working as Brandi works 100% remote. We stayed at the Milton / Gulf Pines KOA Holiday in an executive site (spot F3) with a patio and BBQ for $183.02 for 2 nights. It rained the entire time we were there. The park was nice, and the Wi-Fi was great for working and streaming TV. We would definitely stay here again for a longer period of time. We did meet fellow Instagrammers at this park - Bucketletstravel. Check them out.

We had a decent drive from Lake Conroe to Pensacola. No crazy weather, finally. But I will tell you to plan accordingly along Highway 10 in Louisiana. You are driving mostly over the bayou once you leave Texas and head toward New Orleans and it is not easy to pull off the highway and get fuel in a big rig. We also recommend hopping off of Highway 10 onto Highway 12 and drive around the North side of Lake Pontchartrain. It is a much better drive for big rigs and then you reconnect with Highway 10 in Slidell prior to entering Mississippi. 

Day 6:

We left Pensacola and headed for Orlando to meet an old friend who happened to be in the Orlando area. We stayed at the Southwest Orlando KOA, and we will never stay here again and recommend against anyone staying here honestly. We arrived and checked in in the early afternoon (only KOA that we actually got to check in during business hours). We got an escort to site 50 with full hook ups and pull through for $107.59. This park is full of snowbirds that stay months at a time. Our escort took us the wrong way through the park to our side and had us make a 180 turn to get into our site and we hit a neighboring car. Now, I understand that we have full control of our rigs, but we got too comfortable with allowing work campers escorting us and trusting their route, so this is partially our fault and will NEVER happen again. We show the full incident in our video on YouTube. The issue that we have here is that this park is old and not designed for big rigs and when we hit the neighbor's car, the work camper threw his arms up and said, "I will let management know" and he left. 

After dealing with the neighbor and giving him our insurance info (the ladder we strapped on the back is what scraped his car), we went down and talked to management. Well, really, there was no management on site at the time. So, the work campers made us fill out a report for them to send to KOA Corporate and said nothing. We got absolutely nothing from these people. No customer service. No follow up. No nothing. As a VIP member who stays at KOAs quite often, I feel there should have been a little more customer service during this issue. But we got nothing from them. They charge way too much for their sardine packed sites and very narrow roads. We will never stay here again. 

On the way to Orlando, we had to pull over and reattach the fifth wheel fender. For some reason, it was wanting to fall off. Chris pulled out his tools and made his own bolts and washers for the repair. Thankfully, this was the only issue we had with the RV while driving during this entire trip from Nevada.

Day 7: 

We finally headed down into the Florida Keys. We took Highway 27 from South Orlando down into the Homestead / Redlands area and hit the 18 Mile Stretch to Overseas Highway in Key Largo and made our way down to Big Pine Key. We avoided tolls on this drive as we did not have a Sun Pass set up yet and to save money with the number of axles that we had. Highway 27 is a nice drive for big rigs so if you want to avoid the turnpike and tolls, this is a great alternative. 

The Florida Keys is over 100 miles long with 42 bridges that connect the Keys from Key Largo to Key West. Big Pine Key is at mile marker 30 with the road ending at mile marker 0 in Key West. 

The most famous bridge being the Seven Mile Bridge. These bridges were built over 100 years ago as part of the Flagler Railroad that used to connect the Keys. The Railroad was wiped out in the Labor Day Hurricane of 1935 and these bridges were eventually turned into vehicular bridges. In the 1980s, a new Seven Mile Bridge was built to accommodate larger vehicles and the amount of traffic, not to mention, the old bridge was falling apart. All of the railroad bridges were eventually replaced with new ones and most of the old bridges are still open to pedestrian traffic only for walking and fishing. Check out our video of the Seven Mile Bridge and Pigeon Key on YouTube. 

Big Pine Key is a nature preserve and home to the federally protected Key Deer. They roam the streets, eat your plants and raid your trash cans but they are cute as heck. This spring has given us quite few babies roaming around as well. 

Our second trip for this move happened when our house closed end of April. We took the F350 back up to Nevada to empty the house out and pull our box trailer back to the Keys. We drove Highway 10 all the way to Tucson this time and then straight up through Phoenix, Las Vegas and back to Gardnerville. We stayed at hotels during this trip. Once we left Gardnerville for the last and final time, we pulled the box trailer down the same route as the RV... Highway 40 to Amarillo and then we headed over to Shreveport and down to Highway 10 and over from there. This round trip was about 6,200 miles total and cost us $2,670 in diesel and $2,079 in hotels for 11 nights total round trip. 

Our entire move with both trips driving over 9,300 miles cost us $7,179 in fuel, KOA and hotel expenses. This does not include food or other expenses. But to see both of our daughters and son-in-law every day and our granddaughter is all worth it!

If you do not know our story, we lived in Islamorada on Plantation Key from 2014 to 2020 so we are not new to the Keys life but living in the upper Keys is totally different from living in the lower Keys. Life is definitely different down here (we do miss Islamorada and that is our favorite place in the Keys), but we are super happy to be a 40-minute drive to Key West which is also a favorite for other reasons. We do not know how long this will be home base for us. The kids' military orders are short term so we will see where they end up after the Keys. 

For now, we fit in their front yard and are still planning on looking at property in Northern Florida for a future home base.

We are planning on taking off from the Keys in August 2022 for 2-3 months to go explore and do the RV thing. 

We hope you join us by following us on Instagram

@wanderedoffchris and @wanderingbrandi

and please check out our videos on YouTube. Link is on the website and on our IG pages or search YouTube for Wandered Off. 

Our entire move including the tours of the KOAs mentioned here are in our "house sold" video as shown below. Check us out and please like our videos and subscribe to our channel. We would truly appreciate your support!

Thanks so much!!

Wandered Off

Chris & Brandi


Lake Tahoe Hikes - Our favorite spots to explore!

Lake Tahoe Hikes - Our favorite spots to explore!

Hello fellow wanderers!

We hope you are all doing well and enjoying our vlogs. 

If you are new to our page, we are Chris and Brandi. We left the Florida Keys after living there for 7 years and headed to the Lake Tahoe area for 2 years. Well, actually, our base camp (home) was in the tiny town of Gardnerville on the Nevada side of the Sierra Nevada foothills. South Lake Tahoe was 12 miles from our home. 


This was an amazing back yard to have and explore, especially during the pandemic. We were the only ones around the lake most of 2020. That alone, made it pretty spectacular. 

Here is a list of our favorite hikes around Lake Tahoe and why we recommend the trail. All of these hikes can be found on the AllTrails App. 

Sand Harbor State Park - Tahoe East Shore Trail - Nevada Side

2.6 miles one way (from Sand Harbor to Incline Village)

5.2 miles round trip (if you go to Incline Village and back or vice versa)

145' in elevation gain. 

Path is mostly paved and accessible if there is no snow. We have hiked/walked this path many times in the snow and during the warmer months. This trail has the best views of Lake Tahoe hands down!

This path literally takes you along the shoreline of Lake Tahoe. There are several side trails that take you down to the hidden beaches and additional viewpoints. 

Parking and accessibility: You can park at Sand Harbor State Park which requires an entrance fee, or you can park at Memorial Point Scenic Overlook, but this parking is limited to spaces and has time constraints, but there are restrooms here. You can also park in Incline Village and walk South along the East Shore Trail.

Sand Harbor State Park has a nice visitor center with tons of Tahoe history in the museum and a gift shop. They have a seasonal restaurant open in the warmer months and in the colder months they offer a horse sleigh ride and a food truck with hot cocoa and tea. The beaches at Sand Harbor are our favorite too! Absolutely stunning and a must if you are in the area, even if you don't explore the trails... check out the beaches!

Nevada State Parks including Sand Harbor are changing to a reservation system starting some time in 2023. Sand Harbor is day use only (no camping) but they experience such a high volume of visitors that you will be required to get a reservation a head of time to enter the park. This park also has a boat ramp and places to paddle board and kayak. 

The Tahoe East Shore Trail also offers plenty of benches and resting areas to stop and take in that amazing and stunning view! You will not be disappointed with this trail or Sand Harbor State Park. Well worth a visit. Please note, this place is beyond packed with people in the summer months so plan accordingly. The park will close its gates when they reach capacity early in the day. For additional views and information, please watch our video on YouTube, search for Wandered Off or click the link on our website. 


Skunk Harbor Trail - Nevada Side

2.8 miles out and back

570' elevation gain - you hike down to the lake and all of this elevation gain is the hike back up. 

This hike is mostly down an old road that leads to an abandoned 1920s summer home that a wealthy Bay Area family built and kept until the state took it over. This trail is located on the Nevada side just South of Sand Harbor State Park and can be easily found on AllTrails under Skunk Harbor. There is limited parking at this trailhead along the side of the highway (no parking lot) so go early or go later in the afternoon for sunset (which is our favorite time to hike). 

The old house is made completely of stone and the state has put wire mesh over the windows so that you can still see in the house. The stories this building can tell, if only these walls could talk! Please do not vandalize the building and pack out what you pack in. There are no restrooms or trash cans here. 

The views that you get along the trail on the way down are stunning. We have hiked this trail in the snowy winter and the spring and fall months. We avoided Tahoe in the summer due to the high volume of crowds during that time. 

Tips: Wear good shoes and have plenty of water. The switchbacks going back up get pretty steep in some areas. Pack a picnic for the beach. 

The beach is calm and relaxing and a nice spot to dip in on a hot summer day. You can even see the remnants of the old dock that belongs to the house. 

We love this hike and did it often because it is still somewhat of a secret and not a lot of people make the trek down to the lake. It is beautiful the entire way down and we love historic buildings and of course, the beach! Check out our video on YouTube for more info.


Emerald Bay State Park - Rubicon Trail - Upper and Lower Eagle Falls - California Side

Emerald Bay State Park is a favorite area to explore on the California side because it contains a few of our favorite hikes. This state park is also home to the Vikingsholm Castle and Fannette Island. There is a beach here, picnic areas, restrooms, kayaking and paddle boarding as well. Boaters will also come into Emerald Bay for the day and hang out. 

The Rubicon Trail:

16.4 miles out and back (if you start at D.L. Bliss State Park which is North of Emerald Bay, and you hike it out through Emerald Bay and back to D.L. Bliss).

2,306' of elevation gain

The Rubicon is an absolute favorite and not an easy trail. It technically starts at D.L. Bliss State Park and makes it way around the Lake Tahoe shoreline to Emerald Bay State Park and pass-through Emerald Bay and ends at Upper Eagle Point Campground which is just South of the Emerald Bay State Park. There is so much to explore along the Rubicon and the views of the lake are stunning. This is a very popular trail so be prepared for a lot of people during the warmer months. 

D.L. Bliss State Park closes during snow so if you want to access this hike during the winter months, be prepared to hike another few miles just to get the trailhead and back as the gate will be closed.

Upper Eagle Falls:

AllTrails App = Eagle Falls Vista Point Loop

0.6 mile loop trail

144' elevation gain

This trail is located just above Emerald Bay State Park with a separate parking lot area and restroom. We hiked this during the snow and the place was still packed with people and the parking lot was closed because it was snowed in. So, we found a spot on the road to park. We wore spikes which helped but the snow was melting in the early spring, and we ended up falling through the snow a few times which was about 3' deep in most spots. 

Make sure you hike up to the viewpoint because the views of Emerald Bay are fantastic from that elevation! You also look down on the Upper Eagle Falls from this viewpoint. The falls were frozen and mostly covered in snow but they were still roaring! This trail also continues over the falls up to Eagle Lake which requires a permit. 

Lower Eagle Falls:

Not on AllTrails but accessed via Emerald Bay State Park. This trail crosses over the Rubicon Trail and continues up some steps to the lower falls. The lower falls are beautiful, and it is a short hike to get to them. Spring is the best time to visit to get a full running waterfall. 

We have included this short hike in our Emerald Bay State Park video on YouTube.

Emerald Bay State Park:

This is a unique state park in the fact that you park in a parking lot, pay your fee and then hike down to the park. You hike down a one-mile steep dirt road to the main park area. Remember, you must hike back up this steep one mile to get out of the park. This park has picnic areas, restrooms, visitor center and the Vikingsholm Castle. You can also park and access the Rubicon trail from here as well if you wanted to do the Rubicon in sections. 

Fallen Leaf Lake - Glen Alpine and Grass Lake:

5.3 Miles out and back

680' elevation gain

This trail is on the back side of Fallen Leaf Lake near Lake Tahoe and is only accessible in the warmer months. Make sure you explore Fallen Leaf Lake and their marina. They rent kayaks and have a small beach area with a restaurant. All seasonal. Keep going up the road and make sure you stop at Glen Alpine Falls. They are beautiful and deserve a stop! We then took the Grass Lake Trail on AllTrails that also took us through the Glen Alpine historic camp which still has structures standing and in use. This trail is beautiful, but we did encounter mosquitoes through this area which is rare around Tahoe. Check out our video on YouTube. 


We also have several hikes that we loved just South of South Lake Tahoe along Highway 89. Woods Lake, Winnemucca Lake and the millions of other alpine lakes along this area. There is so much to explore here and the hiking is epic. 

We hope you enjoy this area as much as we did for the last two years that we called it home. Check out our videos of these hikes and parks on our YouTube. Search for Wandered Off or click the link on our website. You can us on Instagram as well. 

@wanderingbrandi

@wanderedoffchris

Facebook, Pinterest and TikTok find us under Wandered Off. 

We also have cool Wandered Off merch on our website www.wandered-off.com

Thanks so much for checking in with us! We truly appreciate your support.

Wandered Off

Chris & Brandi

Dubois, Wyoming! A hidden gem and less crowded alternative to Jackson Hole

Dubois, Wyoming! A hidden gem and less crowded alternative to Jackson Hole

Hello fellow wanderers!

How many of you have been to Dubois, Wyoming? I am sure, most of you have been to Jackson Hole and that surrounding area but Dubois seems to be a less traveled town. 

We were booking our 2021 summer road trip in January of 2021 and all RV parks in Jackson and close to, were completely booked already. Insane right! Seems to be the latest trend, having to book a year in advance. However, even though we are planners, we are not "a year in advance" planners. So, we started to search within a two-hour radius of Jackson. We have already "done" Yellowstone and parts of Grand Teton and this trip we wanted to focus only on Grand Teton and other areas. 

That is how we stumbled upon the cute, charming little ol cowboy town of Dubois. Pronounced by the locals DEW-boys. Dubois is 1.5 hours from Jackson and 1 hour from Grand Teton. It sits an elevation of 6,900 feet. Not a bad alternative! Less crowded and plenty to do in Dubois! They even have a replica of the famous antler arch that you find in Jackson Town Square. 

We stayed a week at the Dubois / Wind River KOA Holiday in Dubois in a pull through patio site. Next time, we will opt for a back in site along the river. Very nice KOA with indoor pool and game room, quiet and great WiFi for working remotely. Staff was more than friendly, and the grounds were well kept and beautiful, especially along the river. 

We spent only one day in Jackson riding the Cowboy Coaster at Snow King Mountain and hiking around Jenny Lake. The wait for the coater was 1.5 hours long and to be honest, it was the slowest alpine coaster we had been on. They have automatic brakes that keep you from going full speed. Story goes: two drunk guys fell out of the coaster, so they implemented the automatic brakes. Thanks to those drunk guys, they ruined it for everyone. It was fun to do once but not worth the wait. Jenny Lake was beyond packed with people. Hundreds of people waiting for the ferry and hundreds of people on the trails. So, we decided to stay closer to Dubois where it was significantly less crowded. 

We are not a fan of hiking on trails with hundreds of other people! 

We did take an evening and we booked a float trip down the Snake River in Grand Teton that also included a BBQ dinner. It was a great trip and well worth the drive back to Teton. We booked through Triangle X Ranch, and we highly recommend. We had a great guide who, coincidently, had mutual contacts with us from the Miami area. Dinner was good and the scenery was beautiful, even with wildfire smoke hovering about the majestic peaks. This trip is truly a float trip, no rapids. It was peaceful with great views of the Grand Teton and quite a few birds. We did not see any moose on this trip, but we heard they are there!

Triangle X Ranch has several options for tours so check them out! You will not be disappointed!

Ok, now for our time spent near Dubois! This town is so charming with cute shops and eateries all within a few blocks. You can literally walk this town from the KOA within an hour depending on how much browsing you do. The downtown area is less than a mile long with Wind River running through it. We also want to note that there is plenty of parking on the side of the main highway for RVs if you happen to be passing through and want to stop for a moment. Dubois has a city park that also offers free WiFi. 

Dubois has several attractions and nearby hiking trails that we recommend. They even have a "top ten" sign when you enter town. 

Dubois Badlands Trail is just a few minutes outside of town and stunning. This area reminded us of Southern Utah. We hiked this trail with no other people in sight. 

We also attempted to hike up to Lake Louise along the Torrey Creek waterfalls. We got to the top of the falls when it started to thunder and hail so we turned around, but this trail is simply worth it for the waterfalls. Beautiful country! This hike is within 30 minutes of town. 

We also visited the National Museum of Military Vehicles. This museum is a private collection of all thing's military vehicles and weapons from several wars and just opened in 2020. If you want to be impressed and humbled, this museum is well worth it! We spent four hours here and wished we had all day. This museum is located within 30 minutes from Dubois. 

During the summer months, Dubois has their rodeo every Friday night and we did not pass this up! It was fun to see the locals and people who traveled in to compete in the rodeo. It was a cold misty summer night but well worth it for some cowboy/cowgirl fun! They had merchandise for sale a couple of food trucks on site as well. 

The one place we did not go to was the National Big Horn Sheep Center. It was closed due to the pandemic but we will be back to this area for sure! 

Oh, one other thing, Dubois is famous for its Jackalope! Yes you heard that right, a Jackalope! Happy Jackalope hunting!

There are tons of hiking trails during the summer months and native history to explore. If you stay in Dubois, you will have plenty to do and while we only hiked two trails in the area, we saw no one on the Badlands trail and only one other couple on the Lake Louise trail. Dubois is far less crowded than Jackson which is what we like. We like to wander off on the less travel paths. 

We hope you consider Dubois as a great alternative to Jackson Hole. You will not be disappointed. 

We have videos on YouTube of both hikes, the Military Museum, KOA and the town of Dubois overall, along with the Cowboy Coaster and our Snake River Float Trip. We hope you check them out and they help you plan for your visit to the area! Don't forget to like and subscribe and share our videos! We truly appreciate the support! 

Search YouTube for Wandered Off or follow the link on our website. 

Thank you so much!

Wandered Off

Chris & Brandi 

Paria Canyon: White House Trailhead to Buckskin Gulch - Insanely Beautiful hike!

Paria Canyon: White House Trailhead to Buckskin Gulch - Insanely Beautiful hike!

Hello fellow wanderers!

Southern Utah is absolutely our favorite place to hike and explore. If you have not heard, Buckskin Gulch is the longest Slot Canyon in the United States, and it does not disappoint! 

In October of 2020, we hiked Wire Pass (slot canyon) to Buckskin Gulch. We posted that video a while ago so please check that out. Wire Pass to Buckskin is a short hike and doable for most people. Wire Pass is a pretty cool slot canyon and the confluence at Buckskin has ancient petroglyphs as well. Overall, we highly recommend it. 

In October 2021, we were back in the area RV'ing (because as we stated above, we love this area) and decided to hike out to Buckskin Gulch via the White House Trailhead that takes you through the Paria Canyon/River. This hike out to Buckskin did not disappoint, but it was extremely exhausting!

You really do not need a map as you hike the canyon and there is really no other way to go but as good practice, we always download an AllTrails map just in case.

Fun fact: The Buckskin Gulch & Paria Canyon confluence is technically on the state line between Utah and Arizona. 

You need a day use permit for this hike and the Rangers no longer allow permits at the trailhead so make sure you get your permit at Recreation.gov and you will need to print out the permit and display it on the dash of your vehicle. Permits are $6 per person/dog.

We stopped and checked in with the Ranger at the Paria Station to make sure conditions were safe for our hike. The Ranger stated that we would be crossing water, but the river was low and the 2-mile dirt road to the trailhead was fine. Always check in with a Ranger when you head out into desolate areas like this. 

Tip: Always register at the trailhead. Sign in and sign out. That way the Rangers can keep track of you. If you are in the canyon during a flash flood, chances are you will not make it out. Flash floods can happen without warning.

We clocked this hike at 16 miles and that included a short side hike into a hidden slot canyon that we found near the beginning of the hike. We arrived at Buckskin Gulch in 4.5 hours. It was a brutal and exhausting 8 miles out as we ended up hiking in water most of the time. In some places, the water was knee deep and we hit quicksand under the water. The other times, we were hiking in deep and slippery mud. 

After the first 5 river crossings, Brandi gave in and put her Tevas on. Chris kept his hiking boots on and just rolled with it. 

Brandi hiked about 14 miles in her Tevas and definitely felt it the next day! 

This hike is insanely beautiful and epic in every way. Yes, it was exhausting! We prepped and had what we needed but we still had no idea what we were in for and completely underestimated this trail! 

The best part... we only saw two other people the entire time! Once we got to the confluence, we explored Buckskin Gulch for a bit and that is when another couple arrived. This couple had a permit and backpacks to camp out in Buckskin Gulch.

Fun fact: This is on our list to do! Backpack from the Buckskin Gulch Trailhead to Lees Ferry. We believe it would take about 4-5 days, but we are still researching.

The size and magnitude of this canyon is something to be experienced. You do not realize how vast and large these canyon walls are until you stand there and look up in awe. It was absolutely an incredible experience and one of our top favorite hikes in Southern Utah! 

The image above is of the side hike we did. This slot canyon was super dry and so interesting to see as we just came up from the river. This side hike was short, and the canyon dead ends at a small pool of water.

Tips for a successful hike:

Trekking poles - use them to help you determine how deep the water is.

Hiking sandals or water shoes. 

Towel or extra clothes. You will be wet and muddy.

Snacks and water. This hike took us 9 hours total.

Flashlight (we finished in the dark and always have a flashlight)

Register at trailhead. Sign in - sign out.

Check in with Rangers for road and trail conditions. 

Let someone else know where you are going. Anything can happen out there!

Please check out our video on YouTube: Wandered Off

We hope that our video and blog help you have a successful. 

Please do not forget to like our video and subscribe! We truly appreciate your support!

Wandered Off

Chris & Brandi

Hiking The Wave - Coyote Buttes North - Permit Required - Know before you go!

Hiking The Wave - Coyote Buttes North - Permit Required - Know before you go!

Hello fellow wanderers!

Have you been lucky enough to land a permit to hike The Wave in Coyote Buttes North in Northern Arizona / Southern Utah? 

We finally did! But it took a long time. We tried for 15 months online and even tried three times in person while we spent a week in Kanab back in September 2021 with no success. After not landing a permit in person, we decided we were done trying and moved on to other things. 

Then one day in October 2021, we decided to try one more time. The October online lottery entry is for permits issued in February 2022 so we thought we might luck out since it is winter in February and there might be less people trying.

To apply online, you need to have an account on Recreation.gov with a credit card attached. You can only apply one time a month and you can choose up to three dates in the month you are applying for, and you choose the number in your group. This number also includes dogs, and the max group size is 6 people/dogs. The cost to apply online is $9 a month. 

Only 64 people a day are allowed to visit The Wave. This is equal to 48 people via online permits and 16 people via the in-person lottery. 

Well, we finally won! Applying in October for February paid off! After a long time waiting and trying, we finally got to start planning our trip to hike The Wave!

Since we applied online in October, they notify everyone via email November 1st (or the first day of the next month) whether or not you were awarded a permit. We got a permit online finally for February 1st. February 1st was a Tuesday, and we were excited! When they notify you via email that you won, you will be required to go into Recreation.gov to confirm your permit and pay $7 per person/dog in your permit group. You will also be asked for the license plate of the vehicle that you will be parking at the trailhead. We put in both of our vehicles since we were not sure which vehicle we would be using. They mail you your permit to attach to your backpack (shown above) and your permit that must be displayed on the dash of your vehicle that is parked at the trailhead. They also send you maps and safety information in this package. We received this package in the mail a month prior to our permit date.

A week prior to your hike, they will email you requesting that you attend the safety orientation (shown above) the day before your hike. This is held in the Kanab Central Gym, same place as the in-person lottery. 

Now, let's talk about the in-person lottery process. The in-person process is not an easy way to land a permit. When we tried the last week of September 2021, we tried in-person on a Wednesday, Thursday and Friday. The in-person lottery only issues 4 permits a day or up to 16 people, whichever comes first. So, if the first two permits pulled each include 6 people, that is a total of 12 people and there are only 4 spots left or two permits. If a third permit is pulled with 4 people, a fourth permit will not be issued for that day as they have hit the max. 16 people. When you apply in-person, it is for the next day permit.

When you fill out your application, you will include the number in your group and their names. They will then assign you a number that will go into the lottery wheel (bingo dice in a hamster wheel). They spin the wheel and then release a dice that has a number on it. They call out the number and you hope that it is your number that they call out. Again, they only draw a max of four numbers/permits a day in-person.

In-person lottery is free to apply but you will pay $7 per person/dog if your number is chosen. Small bills if you pay with cash or provide a check.

The days that we tried in-person the last week of September had a total of 56, 74 and 66 groups that applied. With the lottery only drawing 4 or less permits, your odds are pretty slim with that amount of people applying. 

We took our daughter with us to Kanab for our hike to The Wave in hopes that she might win an in-person permit and be able to hike with us. We had to go in the day before anyways for our safety orientation (must show your online permit to the rangers to attend) so she applied for the permit that day. This was Monday, January 31st and there were only 21 applications that day. And guess what... she WON! She was able to hike with us! We were so surprised when her number was called out. It was a great day!

On-line permits are pink, and the in-person permits are blue. The Ranger's state that they are out there watching you and there is a fine of $100,000 and possible jail time if you are caught on the trail without a permit, so we highly recommend that you do not go until you have a permit in hand. 

The safety orientation is very informational. They discuss weather, road conditions and how to safely navigate the trail. The map they supply provides landmarks and they encourage you to rely on their paper map and not use GPS. However, we downloaded our AllTrails map but started out using their landmarks but quickly realized that everything out there looks the same and we got lost right from the beginning. So, we reverted back to our AllTrails map, and it was spot on out and back. 

Whether you are staying in Page, Arizona or Kanab, Utah.. The Wave trailhead is one hour from both of those locations. You will drive Highway 89 to House Rock Valley Road. You will then proceed down House Rock Valley Road for about 9 miles. The road is dirt and a 4WD vehicle is recommended, although the road was recently graded so it wasn't too rough. If it has recently rained or is going to rain, do attempt this road or hike. We show the road in our video on YouTube. 

You will park at the Wire Pass Trailhead. There is a lot of parking spaces available, but it does fill up as this is a very popular place with other trails. Please remember to register at the trailhead (sign in and sign out) and place your vehicle permit on the dash for the Rangers to see. There are restrooms here at the trailhead (no restrooms on the trail). Please be sure to pack in and out your trash, including human waste. 

You will follow the Wire Pass Trail through the wash until you start to see the signs leading you to Coyote Buttes North and the signs clearly say that a specific permit is required.

This trailhead is also used for the Wire Pass Slot Canyon which also leads out to Buckskin Gultch and a day use permit is required for this hike and can be obtained online at Recreation.gov. Day use permits are no longer available at the trailhead. Please check out our other video of our Wire Pass to Buckskin Gulch hike from a year ago. 

It was February 1st and 20 degrees at the trailhead at 7:30am and only two other vehicles in the parking lot. As we headed out and up to The Wave, the wind really picked up as the sun was rising and the temp easily dropped to below 20 degrees. Wear layers and prepare for crazy weather!

We ended up clocking exactly 7 miles roundtrip and about 1,500' in elevation gain. As stated previously, our downloaded AllTrails map was spot on and even shows the arches and other landmarks that you can hike to with this permit. There is a lot to see in this area so make sure to explore beyond The Wave. This hike is mostly in deep sand and over uneven sandstone rock formations. AllTrails considers this hike as moderate and being avid hikers, we agree, but for us, the bitter cold wind made this hike harder than it should have been. Please be prepared for anything!

The Rangers also advised against spikes or trekking poles because they cause additional damage and erosion to the very sensitive sandstone rock. 

You will hike in deep sand, up steep inclines, over sandstone hills, across uneven sandstone and sandy terrain. Good shoes/boots are required!

It took us much longer than we anticipated to get to The Wave. We underestimated the terrain and the cold wind, and we got lost when we tried to follow the Ranger's map. But once we got to The Wave, the sun was still rising, and we had The Wave to ourselves for almost an hour which was amazing. Because we were there so early in the morning, we did not get the sunlight in The Wave but it was still absolutely stunning to see in person. 

It was so cold in The Wave that the water in our camelback hoses froze, our cameras kept freezing and shutting down, batteries drained, and any exposed skin just started hurting. We are not going to lie; it was pretty miserable. But we were not going to let that stop us from exploring as much as we could in that freezing weather. 

We spent quite a bit of time in The Wave and then headed to the Second Wave which is up and over the hill from The Wave. Once we got up and over to the Second Wave, it felt like it was 0 degrees, and the wind was beyond whipping and freezing. We couldn't stand it and decided to head back. We were pretty bummed about not being able to explore the arches and other landmarks out there, but we will be back... during a warmer time! 

Because our water kept freezing and our hands were numbing under our gloves, we did not drink much or snack at all during this hike (which is not a good thing). The only thing about these permits is you have to go the day of your permit or your just forfeit. We tried to make the best of it and do not regret going at all, but we will keep it on our list again for a warmer time of year. We absolutely loved being the only ones in The Wave because when we headed back from the Second Wave there were a few groups of people in The Wave as we hiked through to head back. 

As we made the trek back, we passed several groups of people who were headed out to The Wave which just confirmed to ourselves that being in The Wave that early was absolutely worth it to have it to ourselves! Freezing cold or not! 

We chose to go at sunrise, so we had an entire day to spend out there exploring and to hopefully have some time in The Wave by ourselves. That portion paid off. It might have been warmer later in the day, but we wanted to beat the crowd. 64 potential people in The Wave at the same time is very crowded and rangers recommended to everyone that they start the hike around 9am which is why we went earlier. 

We started the hike at 7:30am and got back to the truck at 12pm. It was still only 24 degrees at the truck but not as windy. 

Overall, it was an amazing experience to see this natural wonder in person. We look forward to returning someday to finish exploring the area. We hope this blog has helped you to prepare for the permit process and the hike. Please watch our video on YouTube of the permitting process and the hike and give us a like and please subscribe. We truly appreciate the support. 

Wandered off

Chris, Brandi & Makenzie

Angels Landing - Zion National Park - We hiked in icy conditions - know before you go!

Angels Landing - Zion National Park - We hiked in icy conditions - know before you go!

Hello fellow wanderers!

We hiked Angels Landing in Zion National Park on Jan. 30, 2022. We were in Kanab for a long weekend because we won the lottery for the Wave (blog and video coming soon) so we decided to hike Angels Landing prior to the permit system taking effect starting April 1, 2022.

There is currently no permit required to hike to the top of Angels Landing but that changes starting April 1, 2022. Please visit NPS.gov for more information on how the Angels Landing permit system will work. 

We watched several YouTube videos of this hike trying to understand what is required for a safe and successful hike but even after watching quite a few videos, we had no idea what we were in for. 

We arrived at Zion around 11:30am. But first, please stop in at the Park House Cafe in Springdale for an amazing breakfast burrito! Staff was friendly and the food was great! 

The Grotto parking lot is where Angels Landing trailhead starts but when we got there the parking lot was full and the ranger was closing down the road due to the capacity being full. The ranger re-directed us back to the Zion Lodge for parking. After driving around for a few, we caught a family leaving and sat and waited for their spot. We felt very lucky at this point to have made it in since it was about noon at this point and there was no parking available, and the roads were closing. 

Parking at the Zion Lodge added about 0.8 miles each way to our hike. We hiked the Grotto Trail from the lodge over to the Grotto picnic area (restrooms available) and then headed across the road and then took the bridge across the Virgin River to the official Angels Landing Trailhead via the West Rim Trail.

If you can park at the Grotto parking area, the trail is 4.4 miles roundtrip with an elevation gain of about 1,600 feet. Parking at the lodge, we clocked in 6.5 miles roundtrip with closer to 1,800 feet in elevation gain. The map below is from AllTrails which we use for all of our hikes.

We started the hike at 1pm and got back to the Lodge at 5:30pm.

After all the research we did, we knew we had a set of steep switchbacks called Walter's Wiggles to hike up. But we did not realize that there is a lower set of switchbacks that we found to be more exhausting than Walter's Wiggles. 

The photo below is the lower (first set) of switchbacks.

Once you hike up the lower set of switchbacks, you start up Walter's Wiggles, shown below. Photo credit unknown (taken from google). We experienced ice on Walter's Wiggles and stopped and put on our spikes. Even with spikes, the trail was slippery. We watched people try to attempt this with no spikes. It was not easy for them, and we highly recommend spikes to be on the safe side.

Now that we are finally at the top of Walter's Wiggles, we took a break at Scout Lookout. Scout Lookout is a flatter area that branches off into multiple trails including Angels Landing and there is a restroom at the lookout (the only restroom on the trail). Good spot for a snack or lunch. 

We now start the official "chain section" of Angels Landing. The chain section was very icy and required spikes (although we saw people hiking it without spikes, in sneakers and in one case, two boys were hiking it barefoot, which we do not recommend). The chain section also requires four points of contact in several areas. My daughter and I brought gloves that we used for Crossfit. We are so glad we did. The chain was cold (temp was in the 40s) and the grip of the gloves helped quite a bit. We highly recommend gloves with a grip for this section of the hike! 

There are quite a few portions of the chain section that go straight up. We highly recommend that if you are afraid of heights or are not sure footed, do not attempt this portion of the trail (unless, of course, you want to conquer your fear). Do not risk your life for that Instagram moment. Your life is not worth it!

Even though it was cold, we still drank about 2.0 liters of water each and ate plenty of snacks. It was a tough hike, and the ice did not help. 

Tips:

Plenty of water

Salty snacks

Good hiking shoes/boots

Spikes in icy conditions (put on prior to chain section, where you can sit)

Gloves with grip for the chain section

Strapped camera to your body for four points of contact

We do not recommend this hike if it is windy, snowy or dark. 

We finally made it to the top of Angels Landing. The views are epic, and the hike up is well worth making it to the top! 

Please check out our video on YouTube. Seach for Wandered Off or click the link on our website. We hope this video and blog help you successfully hike Angels Landing. 

Thank you so much for wandering up to Angels Landing with us. We hope you enjoy your hike as much as we did.

Chris, Brandi and Makenzie